Showing posts with label Crafts. Show all posts

Wednesday, July 23, 2014

DIY Candy Burgers


This has been a very fast-moving and exciting summer with the kids.  This explains why my posts are few and far between lately.  We've had trips to visit family, excursions to the beach and afternoons making crafts.  Recently, the kids and I embarked on making 'burgers.'  It was a fun and easy project that rendered tasty little treats. 

 
All we needed were a few 'Nilla wafers, thin mints, food-colored icing and fruit roll ups. 
We slathered a bit of icing on the bottom of a wafer.  Added the thin mint on top.  We cut green colored fruit roll ups to simulate "lettuce" and then added some more "mustard" and "ketchup" to the top of the thin mint.  Next, top it off with the final wafer...and voila!


The kids had a blast making these miniature burgers (and even more fun eating them).  Other versions of this project used coconut flakes (dyed green) for the lettuce.  And a few sesame seeds on top of the wafer for 'bun seeds.'
 
Have you done any kids' projects this year to share?  Please send them my way!


Sunday, February 9, 2014

DIY: "You make my heart soar"

Recall that earlier this week I had about ten hours on a snow day to keep my kid's entertained?  (read here). 

We headed to pinterest and decided to tackle these Airplane Favors:


The supplies needed for these Valentine's Day favors, included:

  •  Smarties
  • Life Savors
  • Rubber Bands
  • Stick Gum
  • Red Ribbon + Printed Tags ("You make my heart soar")


We learned a few tips along the way. 

 
For one, the rubber bands need to be just the right size or the airplane won't hold it's Smarties base in place.  It's very hard to tell how big these are from the photo, but these ended up being just right.  (About 1.5" in diameter when not stretched)


And two, the stick gum we selected wasn't hard enough and so it would bend when we attempted to put the rubber band ends around it.  I cut a small strip of cardboard from the back of the construction paper booklet and this solved the problem! (We used the cardboard underneath the gum). 


1. Getting started, wheels up!

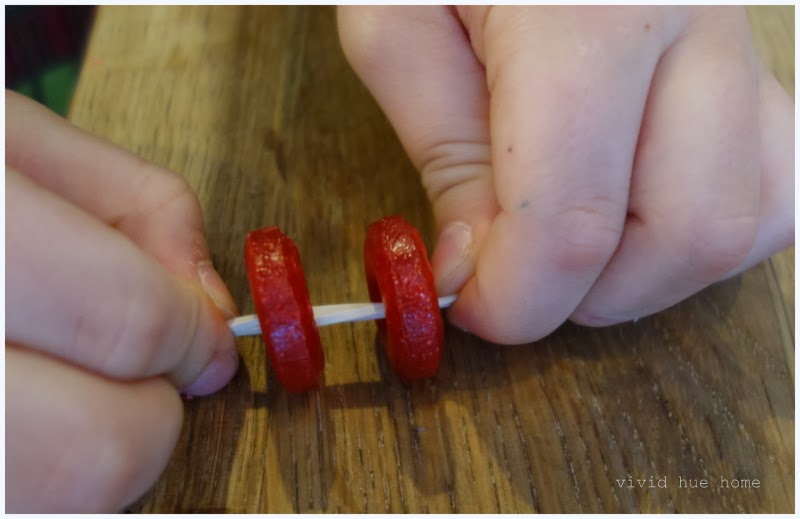
Thread the rubber band through 2 life savers. 


2. The wings

Pull the two ends of the rubber band up around the life savers (almost like straps on a purse).  Place cardboard in between the loops and then the gum. 


Turn cardboard and gum so they are sitting flat across the 'wheels.'


3.  Copter Base

Slightly lift the 'wings' up so you can slip the Smarties underneath.
 
 
Adjust and tie note to end of airplane stating "You make my heart soar" (not pictured)

And then, if you're like us, you repeat this 22 more times for each kid in class!

Do you help your kid's make their class Valentine's?  What ideas have you done? 

Visit more DIY Projects here. 


Sunday, November 4, 2012

I'm not old, I'm just vintage!

 
I've been doing a few little craft projects prepping for the trip to Napa this week.  Initially, my idea was to hand write the guest names onto burlap colored hang tags for our Friday night dinner.  These tags would be tied around a sprig of flowers placed at each setting. 


I was happy with the barn party feel these tags portrayed, but as I continued to plan this Friday night party, it became less and less barn-style...for example, I nixed the burlap table runner and opted for linens that had a bit more oomph. 
 
A la 'seeing spots jazzberry.' 
 
courtesy of La Tavola
  
Yes, it's November in Napa and most people would think fall colors of orange, brown and red. But I'm going to use eggplant, lime greens and deep purples, artichokes, etc. . 
 
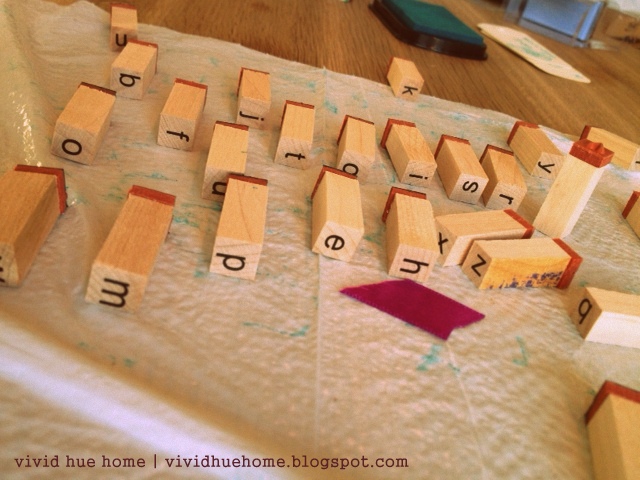
Then I spotted these letter stamps in the craft store today. 
 
 
So my handwritten burlap hang tags have now turned into these...(I'm still going to add twine)


Of course, using these 26 individual letter stamps were much more exciting than organizing my house in prep for my trip, or writing notes for the grand-parents so they'll know how to care for our kiddos while we're away...so I decided to go on a tangent and go crazy with the stamps...

I had extra hang tags and a spare acorn stamp, so I decided to make a "welcome" stamp that I will affix to the welcome baskets that I'm making for our guests.


(Yes, I'm going to include more in the welcome baskets...this is just an example.  I'm hauling the materials with me to Napa and will have Kurby help me assemble them on Wednesday night before most of the guests have arrived.  I'll snap a few grainy iphone photos of the finished products if I haven't had too much vino by that time). 

I saw an awesome stamp that said "I'm not old, I'm just vintage."   I wanted to buy it for this party but I just have to put the stops on this shin dig somewhere! 

Reporting more on this never-ending forty bash later this week!  Oh, you'll surely be sick of this before it's all over. Cheers!  xoxox  Heather


Saturday, February 11, 2012

Valentine's Day Goodies

Each year for Valentine's day, I take a trip to Target with the kids to pick out cards for their classmates.  In years past we've had Olivia, Batman, Superheros, Hello Kitty...the premade Valentines are an easy solution.  Address the envelopes, tape a lollipop to the front and presto!  These little guys are done.   

This year I decided to try to be crafty.  I instilled help from the kiddies so they could be involved with the process.  First, we gathered the necessary supplies:

1. Clear treat bags from Michael's. 
2. Assorted card stock in postcard size. 


3.  I used an exacto knife to resize the card stock to fit the clear bags. I cut another strip of paper that would later "fold" over the top of the bags.


4.  Next, I had the kids stuff each slip of paper into the clear bags.   


5.  Baking!  Anyone that knows me can tell you that I'm not a baker...so I fudged this step by buying the premade sugar cookie roll.  The kids placed each ball of dough onto the cookie sheet.  

6.  Once baked, we frosted and decorated the cookies with sprinkles.  To help "set" the decorations, we placed the cookies into the freezer for the night.  


7.  The Assembly:  The kids put one cookie into each bag.  I then used one of the folded strips of paper to seal and staple the bag.  (If you know me by now, you know I love to mix patterns so I purposely selected a different patterned paper to top the bags). 

8.  My son's Kindergarten teacher asked that each kid label their own cards, so I had him hand write each classmate's name onto the top.  OK, so full disclosure: the top were done by him.  The bottom were written by me for my daughter's classmates. 


9.  I found these adorable personalized Valentines stickers on etsy.com and ordered Darth Vader for my son; Ballerina's for my daughter.  We sealed each bag with a sticker so the kids will know who the Valentines are from.  (Check out belly tickles for options on custom stickers and stationery)!


And the end result...over 40 little handmade Valentines!


And a little dude excited to share his treats with his friends!


Happy Valentine's Day!  Have any ideas that you've made for Valentine's day this year!?  Please share them with me!