Showing posts with label christmas decorations. Show all posts

Tuesday, December 9, 2014

DIY Ombre Christmas Tree

Every year I seem to start decorating for the Christmas season earlier and earlier.  This year has reached an all new milestone.  If I give full disclosure, we put our first tree up two weeks   three weeks ago.  If you follow me on Instagram, you saw the photo of my son's room all decked out for Christmas.  I am not even sure he stripped off his Halloween costume on October 31st before he started stringing colored lights from that newly remodeled room.    


I figured he's eight and the spirit of Christmas is very much alive in his mind.  I'm happy to report that my love of decorating seems to be wearing off on him.  He purchased this Santa Commode cover and matching rug with his own allowance money.  Yes, it was a cringe-worthy moment in my mind in that our 'styles' for how to decorate the house seem to vary slightly (ha) but I still bit my lip and supported his creativity and desire to poop on Santa's beard every time he sits on the toilet seat.

Also, this year, I decided to follow the lead of my friend, Frank (@gayathomedad ) and create an ombre tree for our sunroom.  Here are photos of our house at Christmas last year.
These photos were taken with my iPhone so they're not the best quality but you can get the idea.  


Here's a recall of how the tree looked last year without the ombre effect.  Still very colorful, just not tiered in rows of color like this year:


I purchased over 800 shatter-proof ornaments for the ombre tree in graduated shades.  Then
I had Vivster help me put each individual ornament onto the tree from top to bottom.


I purposefully loaded the tree with more ornaments than empty tree space.  It makes for quite a statement and gives a much more dramatic effect.


I have to say, it's magnificent to see in person!  Thank you to Frank for the idea!
I know it's been some time since I've blogged.  I've had a lot that's taking me away from the blog world....some very exciting news actually.  For a sneak peek of what that may be, please visit me on Instagram.


See more of Vivid Hue at Christmas time here.
In the meantime, hope you're enjoying your holiday season with your family!

Cheers,
Heather | Vivid Hue Home


Friday, December 27, 2013

Vivid Hue Home at Christmas

This Christmas Season came and went in a flash.  I enjoyed it thoroughly and spent wonderful quality time with family and friends.  However, in the midst, I neglected to share photos of my house decorated for Christmas.  So, before it gets too far beyond the Christmas season, here is a Christmas house tour. 

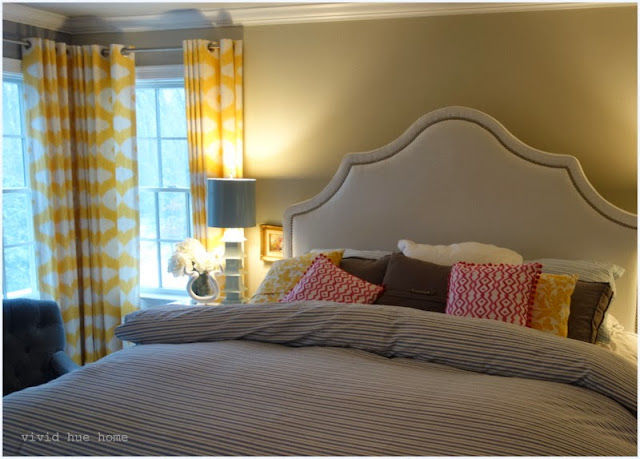
Master Bedroom


Foyer


Family Room


Mudroom 


 Meg Braff's Up in a Tree Bamboo Wallpaper in the Mudroom
 
 
Vivi's 5 year old art from school.  One of my favorite works of art in our home!
 
 
Read more about the Vivid Hue Home DIY X Benches here


Sunroom


read more about this Vivid Hue Home DIY advent tree here


Read about these easy Vivid Hue DIY Wreaths here


Study


Guest Bedroom 


Do you have multiple trees in your house?  Do your trees have different themes?  Do you use real or fake?  How long do you keep your decorations up after the holidays? 
 
Visit here for a house tour of Vivid Hue Home 'Non-Holiday' Style
 
I hope you and your family had a blessed and happy holiday season.  I really am thankful that so many of you decide to show up on my "doorstep" ever day to see what I have to say.  This has been such a fulfilling experience for me and I have ya'll to thank!


Saturday, December 7, 2013

Steps for Simple DIY Ornament Wreath


I made an ornament wreath this year.  Two of them.  Easy peasy and so decorative. 


Here are the items required for the wreath:


Steps required to make the ornament wreath:

 I literally started by hot gluing an ornament on each "side" of the circular foam.  I continued by filling in the spaces, working to fit the ornaments together in somewhat of a pattern.  Sort of like fitting puzzle pieces together. 


Over time, most of the surface was populated with ornaments but traces of the green foam still peaked out between. 


I simply continued adding balls on top of each other, almost forming an additional layer of ornaments.  My goal was to hide as much of the green form as possible.  After awhile, it looked like this (below) and I worried that I'd gone over board.  (Nah, the more garish --for me-- the better in the case of this whimsical little wreath). 


 I finished with a string of garland beads and draped them around the wreath.  Any spaces of the original foam were easily hidden by pushing a few beads down the crevices between the ornaments. 
And the finished result was two of these babies:   (only one shown here, but I have them both on these French doors leading into the sunroom).   


A few tips/ lessons learned:

  •  I needed many more ornaments than I originally thought.  I started with about 40 ornaments per wreath and I ended up going back to Michaels to purchase more.  In total, I'd estimate each wreath required about 60 ornaments.

  • In hindsight, I would have wrapped the green foam circle in red ribbon (or ribbon to match the ornaments.  That way, any angles from the side that were left uncovered would be more attractive.  Also, it would require fewer ornaments "layering on top" of each other to hide the circle form. 

This DIY project was super easy with fun results!

For ideas DIY Ornaments, Check out "DIY Felt Ornaments in 10 Minutes

For a tour of Vivid Hue's Home in Christmas-decoration-progress for 2013, check out "Christmas Garland and Tree Tour"

View Vivid Hue Home's 2012 Christmas Tablescape here

Thanks for stopping by.  Hope you're enjoying the holiday season!  If you're new to my blog, please follow me!  I love friends and I follow back. 

Cheers,  Heather |  Vivid Hue Home